
An engine’s top and bottom rebuild involves a complete overhaul, which includes replacing the piston rings, bearings, gaskets, seals, and other components.
While a rebuild can improve engine performance and extend life, it can also introduce new issues if not done correctly.
One common problem that can occur after a top and bottom rebuild is starting trouble.
The reasons why an ATV is hard to start after a top and bottom rebuild can vary.
Still, some common causes include incorrect timing, low compression, clogged fuel filter, faulty carburetor, or issues with the ignition system.
It’s important to systematically check and diagnose each potential issue to determine the root cause of the starting problem.
However, like any other machine, ATVs require maintenance and repair to function efficiently. In this article, we will dive into the reasons behind this issue and provide solutions to overcome it.
Understanding The Top And Bottom Rebuild
A top and bottom rebuild involves dismantling and rebuilding the engine with new components.
The engine’s top end consists of the cylinder head, valves, and camshaft, while the bottom end consists of the crankshaft, connecting rods, and pistons.
Why Starting Trouble Occurs After A Top And Bottom Rebuild
1. Engine Seizure
Engine seizure occurs when the piston seizes in the cylinder due to overheating, lack of lubrication, or incorrect fuel mixture.
A seizure can cause damage to the cylinder, piston, and connecting rod, leading to starting trouble.
2. Improper Assembly
Improper assembly of the engine can cause starting trouble. During a top and bottom rebuild, several components are replaced or reassembled, and any mistake in this process can affect the engine’s performance.
3. Faulty Electrical Components
The electrical components of an ATV, such as the starter motor, battery, and spark plug, play a vital role in starting the engine. Any fault in these components can cause starting trouble.
4. Carburetor Issues
The carburetor is responsible for mixing air and fuel to create a combustible mixture for the engine.
Any issue with the carburetor, such as clogged jets, incorrect adjustments, or worn-out components, can cause starting trouble.
5. Fuel Delivery Issues
Fuel delivery issues, such as a clogged fuel filter, faulty fuel pump, or a blocked fuel line, can prevent the engine from starting.
6. Ignition Timing
Ignition timing refers to the timing of the spark that ignites the fuel-air mixture in the cylinder.
Any issue with the ignition timing, such as incorrect adjustment or faulty components, can cause starting trouble.
7. Improper Break-In Procedure

After a rebuild, following a proper break-in procedure is essential to allow the new components to sit correctly.
Failure to do so can lead to increased engine wear, reduced performance, and starting trouble.
The break-in procedure typically involves a series of steps, including running the engine at varying RPMs and avoiding high loads and excessive heat for the first few hundred miles.
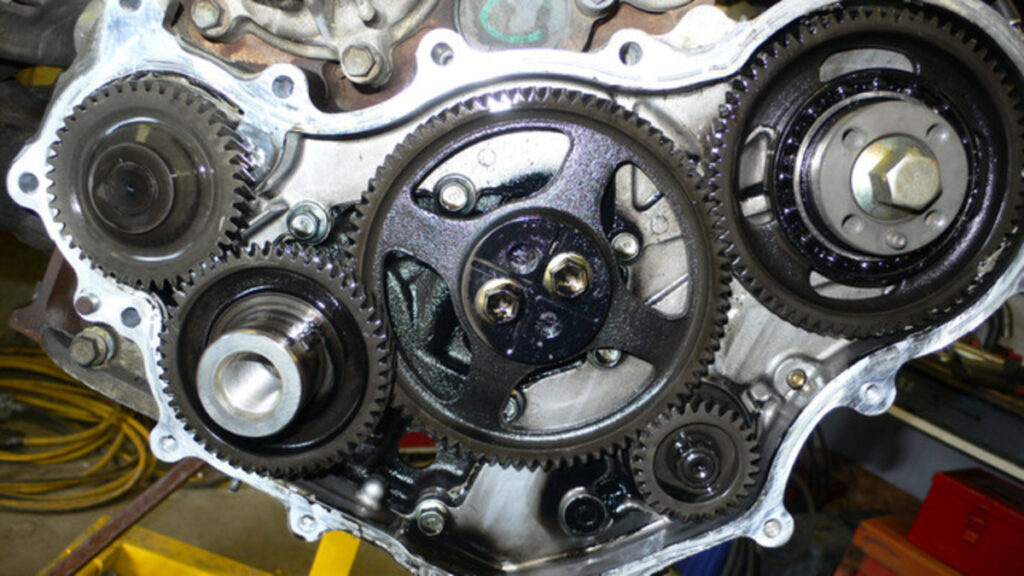
8. Incorrect Timing
The timing of the engine is critical for proper combustion and engine performance.
If the timing is not set correctly during the rebuild, it can cause starting trouble and reduced performance.
The timing can be adjusted by rotating the distributor or adjusting the timing belt or chain.
9. Fuel Issues
Fuel issues can also cause starting trouble after a rebuild.
If the fuel system is not properly cleaned during the rebuild, it can cause clogging and blockages in the fuel lines, filters, and injectors, leading to trouble.
Additionally, if the fuel pump is not replaced or properly reassembled, it can cause reduced fuel pressure, which can also cause starting trouble.
10. Electrical Issues
Electrical issues can also cause starting trouble after a rebuild. If the battery, starter motor, or alternator is not correctly tested or replaced, it can cause starting trouble.
Additionally, if the spark plugs, wires, or distributor cap are not replaced or properly installed, it can cause a reduced spark and starting trouble.
11. Mechanical Issues
Mechanical issues can also cause starting trouble after a rebuild.
If the engine is not correctly assembled, it can cause problems with compression, fuel delivery, and spark, leading to starting trouble.
Additionally, if the valve timing or clearance was not set correctly during the rebuild, it can cause reduced performance and starting trouble.
Solutions To Overcome Starting Trouble After A Top And Bottom Rebuild
Now that we know the reasons behind starting trouble after a top and bottom rebuild, let us look at the solutions to overcome it:
1. Check The Engine Seizure
The first step in overcoming starting trouble is to check if the engine has seized. To do this, remove the spark plug and try to turn the engine over by hand.
If the engine does not turn, it may have seized, and you will need to disassemble it again to check for any damage.
2. Reassemble The Engine Correctly
If the engine has not seized, the next step is to check if it has been reassembled correctly.
Double-check all the components, including the valves, camshaft, piston, and connecting rod, to ensure they are in the correct position and tightened to the recommended torque.
3. Check Electrical System
If the timing, fuel delivery, and compression systems are all working correctly, the next thing to check is the electrical system.
Start by checking the battery to ensure it’s fully charged and in good condition. If the battery is weak or damaged, replace it.
Check the starter motor to make sure it’s functioning correctly. If it’s not, replace it.
Finally, check the spark plugs and ignition coils to ensure they’re not damaged or faulty. If they are, then replace them asap.
4. Check The Carburetor
The carburetor is responsible for mixing air and fuel to create a combustible mixture for the engine.
Check the carburetor for issues like clogged jets, incorrect adjustments, or worn-out components. Clean or replace any faulty parts.
5. Check The Fuel Delivery System
The fuel delivery system is crucial in delivering fuel to the engine. Check the fuel filter, pump, and fuel lines for clogs or leaks.
Replace any faulty components and clean the fuel system if needed.
6. Check The Ignition Timing
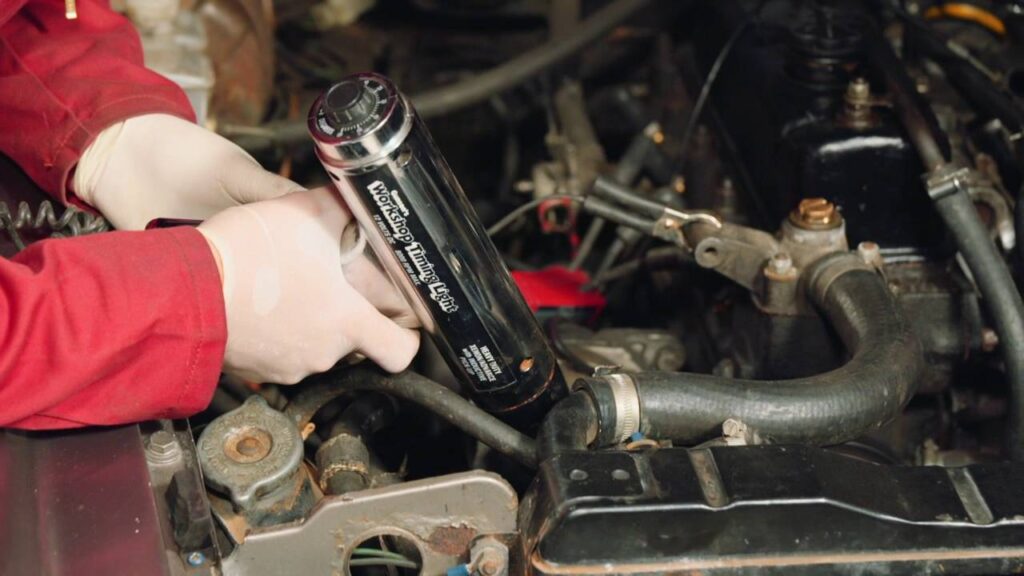
The ignition timing determines when the spark ignites the fuel-air mixture in the cylinder. Check the ignition timing to ensure it is correctly adjusted.
Change the timing according to the manufacturer’s specifications if the timing needs to be corrected.
7. Ensure Proper Break-In Procedure
A proper break-in procedure is essential for any new engine’s longevity and performance, whether in a car, motorcycle, or another vehicle.
Here are some steps you can take to ensure a proper break-in procedure:
- Read the manufacturer’s instructions: The first step is to read the manufacturer’s instructions carefully. Each engine may have unique requirements, and following the manufacturer’s instructions is crucial to ensure you don’t damage the engine during the break-in process.
- Avoid over-revving the engine: During the break-in period, it’s important to avoid over-revving the engine. It means pushing the engine slowly and accelerating slowly. The goal is to gradually increase the engine’s power over time.
- Vary the engine speed: Another key step is to vary the speed during the break-in period. It means keeping the engine at a constant speed for only a short period. Instead, it would help if you varied the engine speed by accelerating, decelerating, and using different gears.
- Avoid heavy loads: During the break-in period, it’s also essential to avoid heavy loads on the engine. It means not towing heavy loads or carrying heavy loads in the vehicle. The goal is to keep the engine’s workload as light as possible during the break-in period.
- Change the oil and filter: It’s a good idea to change the oil and filter after the first few hundred miles of driving. It will remove any metal particles that may have accumulated during the break-in period.
- Follow the recommended mileage: Follow the manufacturer’s recommended mileage for the break-in period. It is typically around 1,000 miles but can vary depending on the engine. During this time, following all the steps above is essential to ensure the engine is properly broken in.
Following these steps ensures your new engine is properly broken in and ready for years of reliable performance.
8. Check The Timing
If the engine is not starting or running poorly after a rebuild, check the timing first.
Make sure that the timing chain or belt is installed correctly and that the timing is properly adjusted.
If the timing is off, adjust it according to the manufacturer’s specifications.
Additionally, check the condition of the timing components, such as the timing chain or belt, tensioner, and guides.
If any of these components are damaged or worn, replace them.
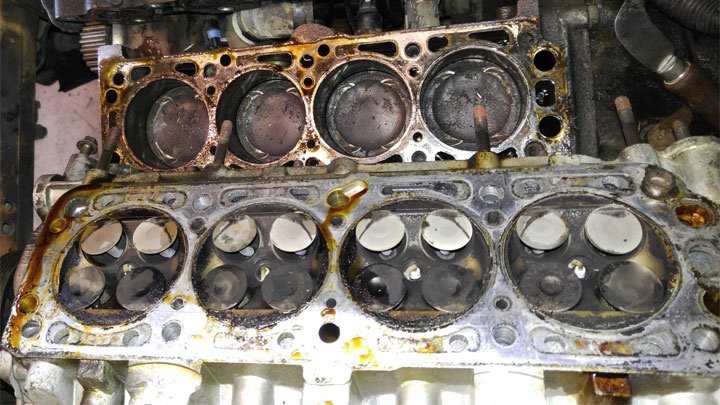
9. Check Compression
If the timing and fuel delivery systems are working correctly, the next thing to check is the engine’s compression.
Use a compression gauge to test each cylinder’s compression.
If the compression is low, check the condition of the piston rings, cylinder walls, and valves.
If any of these components are damaged or worn, replace them.
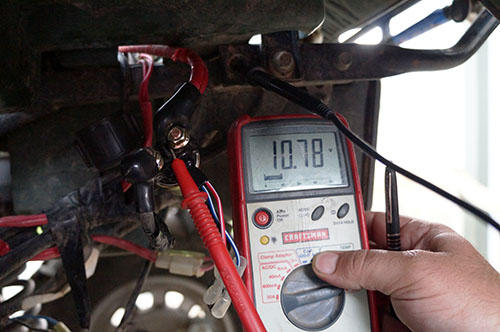
10. Check The Battery
The battery is the heart of the electrical system, and if it’s weak or not holding a charge, it can cause starting trouble.
Check the battery voltage with a multimeter, and ensure it’s at the proper voltage for your vehicle.
If it’s not, charge the battery and test it again. If the battery won’t hold a charge, replace it.
11. Check The Starter Motor
The starter motor is responsible for cranking the engine; if it’s not functioning correctly, the engine won’t start.
To check the starter, use a multimeter to test the voltage at the starter solenoid while someone turns the key.
If the voltage is correct and the starter still won’t turn, the starter may be faulty and need to be replaced.
12. Check The Spark Plugs
Spark plugs ignite the fuel mixture in the cylinders, and if they’re not working correctly, the engine won’t start or will run poorly.
Check the spark plugs’ condition and replace any fouled or damaged ones. Use a spark plug tester to test the spark plugs for proper firing.
13. Check The Ignition Coils
Ignition coils generate the high voltage needed to ignite the fuel mixture in the cylinders.
If the coils are not functioning correctly, the spark plugs won’t fire, and the engine won’t start.
Use a multimeter to test the resistance of the coils and replace any that are out of specification.
Conclusion
Starting trouble after a top and bottom rebuild can be frustrating, but several solutions exist to overcome these issues.
By checking the timing, fuel delivery system, compression, and electrical system, you can identify and fix the problem.
And it can occur for several reasons, including improper break-in procedures, incorrect timing, fuel issues, electrical issues, and mechanical issues.
Always refer to your vehicle’s service manual for specific instructions on troubleshooting and repairing starting issues.
With patience and persistence, you can get your engine running smoothly again.
Frequently Asked Questions
1. Could An Incorrect Timing Be Causing My ATV To Be Hard To Start After A Rebuild?
Yes, incorrect timing can cause an ATV to be hard to start after a top-and-bottom rebuild.
The timing must be set correctly for the engine to start and run smoothly.
If the timing is off, it can cause starting issues and poor performance.
It’s essential to refer to the service manual for your specific ATV to ensure the timing is set correctly.
2. How Can I Check The Compression In My ATV After A Rebuild?
To check the compression in your ATV after a rebuild, ensure the ATV is on level ground and the engine is warmed up.
Remove the spark plug, screw a compression gauge into the hole, and crank the engine. Compare the reading to the manufacturer’s specifications.
3. Why Is My ATV Still Hard To Start After Checking The Timing And Compression?
If an ATV is still hard to start after checking the timing and compression, it could be due to other issues like a clogged fuel filter, faulty carburetor, ignition system problems, or a weak battery.
Further diagnosis is needed to determine the root cause.
4. How Can I Check The Fuel Delivery System In My ATV After A Rebuild?
To check the fuel delivery system in your ATV after a rebuild, inspect the fuel lines, filter, and carburetor for any clogs or leaks.
Use a fuel pressure gauge to check the fuel pressure and ensure it is within the manufacturer’s specifications. Clean or replace any components as needed.
5. After A Rebuild, How Can I Check The Spark Plugs And Ignition System In My ATV?
To check the spark plugs and ignition system in your ATV after a rebuild, remove the spark plugs and inspect them for wear and damage.
Use an ignition tester to check for sparks. Check the ignition coil, CDI unit, and wiring for any damage or loose connections. Replace any faulty components.
Related Articles
- 2021 Axis 500 Noise When Coasting Downhill – Safe Your Ride In 2023
- All Know About Stock Baffle Removal Of ATV – Complete Guide
- Are 400 Hours A lot For Atv? | 5 Factors In Detailed 2023
- Are Japanese ATV Brands Better Than Chinese?
- ATV Accelerating Without Giving It Gas – Facts One Must Know In 2023!